|
|
||
|
|
|
|
Anchoring basics*
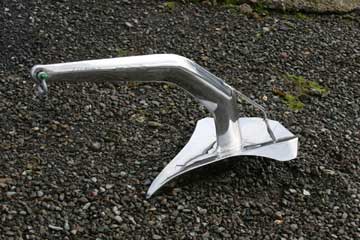
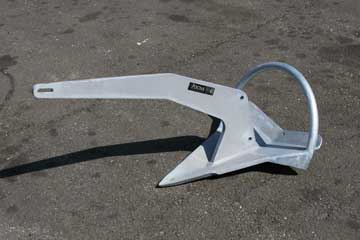
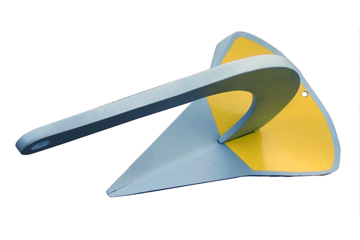
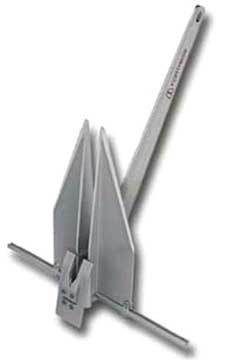
Most anchorages consist of one of three types of bottoms: mud, sand, or rock, with mud being quite predominant. The cruising guides and harbor charts show you where the best anchorages are and what the bottom composition is likely to be, so there’s not much guesswork. Just bear in mind that how the cruising guides rate an anchorage may have more to do with the anchor they used, than how good or bad the holding actually is. Usually the anchorages are in the prevailing lee of an island or shore. Depending on the conditions on a given day, different choices may provide the best holding ground in a particular harbor or reasonable access to shore side activities. You’ll have to weigh your options against your plans. The best anchorage for any particular night depends on the weather conditions predicted. Listen to NOAA weather radio on your VHF first, then choose your spot for maximum protection from the wind and the waves to keep your family snug and comfortable all night long. If a scorcher is predicted, you’ll want to pick a spot where you’ll be able to scoop in some breezy relief. After countless thousands of miles of cruising and anchoring under many trying conditions, we have settled on a few select anchors onboard. Our primaries have become the Ultra, the Rocna and the Spade, all new generation scoop type anchors. We deploy them off the bow, with all chain rode on the primary and a chain/rope combination on the secondary, and we absolutely need a windlass to manage them. We have been extremely pleased with the performance of each and have rarely had occasion to reset. All have been tested under conditions of more than 50 knots sustained wind and significant chop without incident. All scoop type anchors dig deep as the wind increases, they veer well, and do not pull out with drastic changes in wind and tide. Because of the size of our boat, and consequently our anchors, we also carry lighter weight anchors to deploy for special circumstances, like when we want to deploy a stern anchor or backup anchor. The aluminum Fortress is ideal for deploying via dinghy because of its light weight. The Delta is handy to keep on deck at the stern ready to deploy on a rope road when needed, as when the bottom is harder or composed of shellfish which a Fortress doesn’t like. We do not specifically endorse any manufacturers’ products. We only report our experience to date with the anchors we have had occasion to use, successfully or not. As mentioned before, our experience with the CQR, which included inconsistent ability to set, several instances of dragging in storm conditions and many sleepless nights, have caused us to leave that particular anchor at home. Avoid cheap imitations!We mentioned before that not all anchors of one type are created equally. We lost our trusty Fortress, the original primary anchor on a previous boat, and resorted to using our backup fluke type anchor that was considerably larger than our Fortress but had no identifiable markings. Suddenly, we were having difficulty setting the anchor when we never had problems before. We spent a whole season wondering what had happened to our anchoring skills, until we bought a new Fortress. What a difference! Smaller, lighter, and sets and holds far better than the no brand one, despite appearing almost identical. We have to assume it was a less expensive generic version bought as a backup by the previous owners of our boat. We have since heard many horror stories from people who bought cheap imitations that looked to them identical to the real thing. Flukes have bent and broken, shanks have sheared off, and some have failed to set and hold at all. Your boat and your well being is worth more than the couple of hundred you may save on a copy. >>> Click here for more on: Dropping the hook = Anchoring method <<< Our favorite anchors for our boat and most bottom types
Bottom ConsiderationsWe found one spot where our fluke style anchor kept dragging no matter what we did. That was the day we switched anchors to a plow and it held like a charm. We surmised that the bottom was solid shells there. CurrentsOne other consideration has to do with currents. Occasionally, you’ll anchor in a place where the current is strong enough to reverse you against the wind. In this case, two things can happen. First, the wind acting against the current can create a chop and make it quite uncomfortable, not to mention worrisome in the middle of the night until you figure out what’s different. Second, the windage in the opposite direction of the set of your anchor can pull your anchor out. Some anchors will reset rather quickly if this happens and there is enough space. The CQR is known for that. But if you know there will be a change of current, as would happen on a river or near a channel in a bay, and the wind is predicted to be significant, you may get more peace of mind from setting a second anchor. In this case, you set your anchor in the direction of the prevailing wind or current (whichever is stronger at the time) and then use your dinghy to set a second anchor in the opposite direction. Then you’ll be reasonably assured of staying put. *Every boat, every bottom, every anchor, every condition, every situation is different, so what works best with our gear for us may not be best for you. Please be sure to consult your equipment manufacturers for their specific recommendations. We do not and cannot accept any liability or responsibility whether expressed or implied for how or if any piece of equipment or method performs or is applied. There are inherent dangers to boating and every skipper and crew member must accept these prior to embarking onto a boat. Anchoring Seminar Offer:The Editorial Staff have a 1-2 hour anchoring seminar complete with handouts that they can deliver at major events by special arrangement. Contact us We also do this on a regular basis as a webinar
Alex and Daria Blackwell are the authors of “Happy Hooking - The Art of Anchoring.” It covers every aspect of anchors and anchoring in a fun and easy to read format with lots of photos and illustrations. It is available from good chandleries, Amazon and on our publishing website. For more information on this subject or on anchoring in general, please see our book: Happy Hooking - the Art of Anchoring |
|
|||||||||||||
|
Europe: Port Aleria, Rosnakilly, Kilmeena, Westport, Co. Mayo, Ireland - USA: PO Box 726, Mahwah, NJ 07430 All content on this site is subject to Copyright© - All rights reserved. Contact us - Advertising - Privacy - Terms & Conditions - Copyright & Trademark - Webmaster |