|
|
||
|
|
|
|
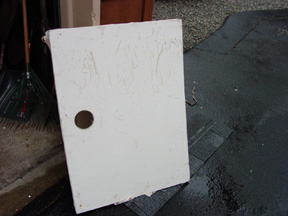
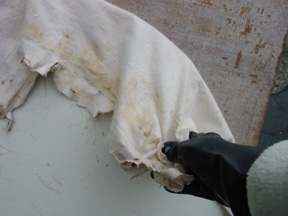
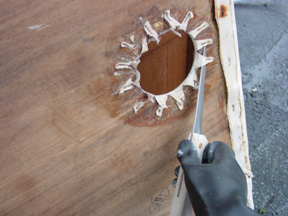
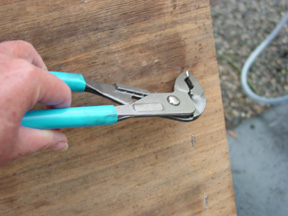
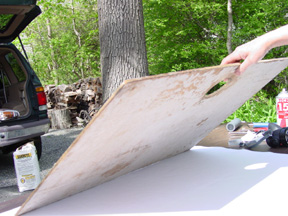
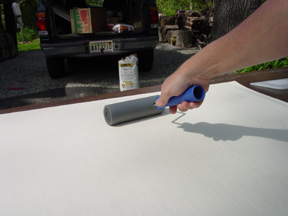
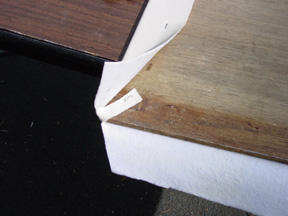
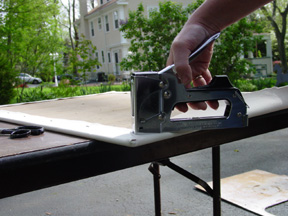
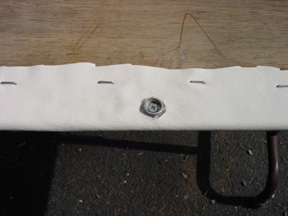
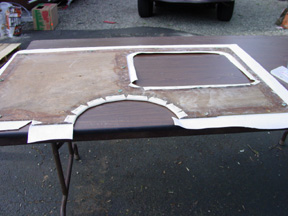
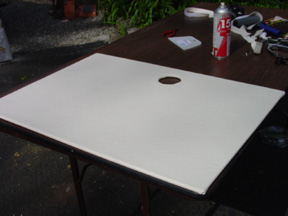
Replacing Headliner on a BoatIt's a lot of frustrating work, but doable.When we bought our vintage ketch, one of the first big projects was replacement of the headliner in the forward compartments which had deteriorated somehow and become tacky. The surface was actually gooey to the touch and scuffed up majorly as a result. We got an estimate from a local shop and after the sticker shock, the timing issues (they were backed up for weeks) and the hassle factors, we decide to do it "ourselves" (that means moi). We removed the headliner and brought it home for a "winter" project. I started by researching the materials online. What I found is that I could get materials inexpensively from fabric discounters locally, but they couldn't always guarantee that they would be suitable for marine use. Marine grade vinyl is treated for mold and mildew resistance, and although some other vinyls may have also been so treated, if it did not say "for marine use" I chose to pass it by. This was one job I did not want to repeat. I chose a textured off-white lined vinyl. The lining meant I did not have to pad it, which would have added an extra layer of work and expense. I chose off white because it would reflect light and would probably be easier to match than anything else later on. I chose textured to add some visual interest. As it turned out, the hardest part was removing the old headliner. As with most boats, the panels are cut exactly to the shape of the boat. In ours, the plywood and snap fasteners were still in reasonably good condition so I chose to reuse them. But it meant struggling to remove the old headliner which was quite stuck on well, and pulling out millions of staples and a few tacks. This was tedious. It took days. This was when I started second guessing whether I had made the right decision to DIM. If I did this ever again, I would use the old wood as a template and replace the lot. The rest was actually easier than I expected (thank goodness). Once I had the boards cleared, I simply used them as templates. The size of the boards proved unwieldy so as soon as the weather improved I took the whole project out to the garage working across sawhorses, picnic tables and so on. Finding the right tools was the crux. Once I had all the pieces cut. I got all my tools together - super spray adhesive, staple gun with the proper length of STAINLESS STEEL staples (anything else would rust instantly), scissors, knife and smoothing tools - and started assembling. This part was actually very rewarding. The spray adhesive was great. Be sure to wear a really good filtering mask because that stuff will glue your lungs together if inhaled. The trickiest part was getting the corners properly cut and neatly folded. Once I figured that out, I got into a groove and completed the liners in no time at all. A final tip, store the new headliners with two tops facing together to prevent scratching then two backs facing together and so on.
Further Reading:
|
|
|||||||||||||||||||||||||||
|
Europe: Port Aleria, Rosnakilly, Kilmeena, Westport, Co. Mayo, Ireland - USA: PO Box 726, Mahwah, NJ 07430 All content on this site is subject to Copyright© - All rights reserved. Contact us - Advertising - Privacy - Terms & Conditions - Copyright & Trademark - Webmaster |